Configure Classic Load Balancer in AWS

Load Balancer - What IS IT ?
A load balancer acts as the “traffic cop” sitting in front of your servers and routing client requests across all servers capable of fulfilling those requests in a manner that maximizes speed and capacity utilization and ensures that no one server is overworked, which could degrade performance. If a single server goes down, the load balancer redirects traffic to the remaining online servers. When a new server is added to the server group, the load balancer automatically starts to send requests to it.
Here I Am going to explain how to configure classic Loadbalncer behind the two ec2 servers.
What we are going to do.
- Deploy two EC2 Linux servers
- Install and configure Nginx (Web) Service
- Configure AWS Classic Loadbalncer in front of two Servers.
1.Deploy Two EC2 Linux servers on AWS
If you are not aware how to launch AWS Linux instance check my Article in the below link. 👇
i have choose Amazon linux on that article. you must want choose ubuntu ami on AMI Selection page
2. Install and configure Nginx (Web) Service
- First update the os
sudo apt-get update
- Then install nginx package
sudo apt-get install -y nginx
- Restart the nginx service and enable on system startup.
sudo systemctl restart nginx
sudo systemctl enable nginx
If you want deep dive on Nginx installation on ubuntu check my article. 👇
https://venket.hashnode.dev/install-nginx-server-and-secure-your-website-with-certbot-ssl-on-ubuntu-18
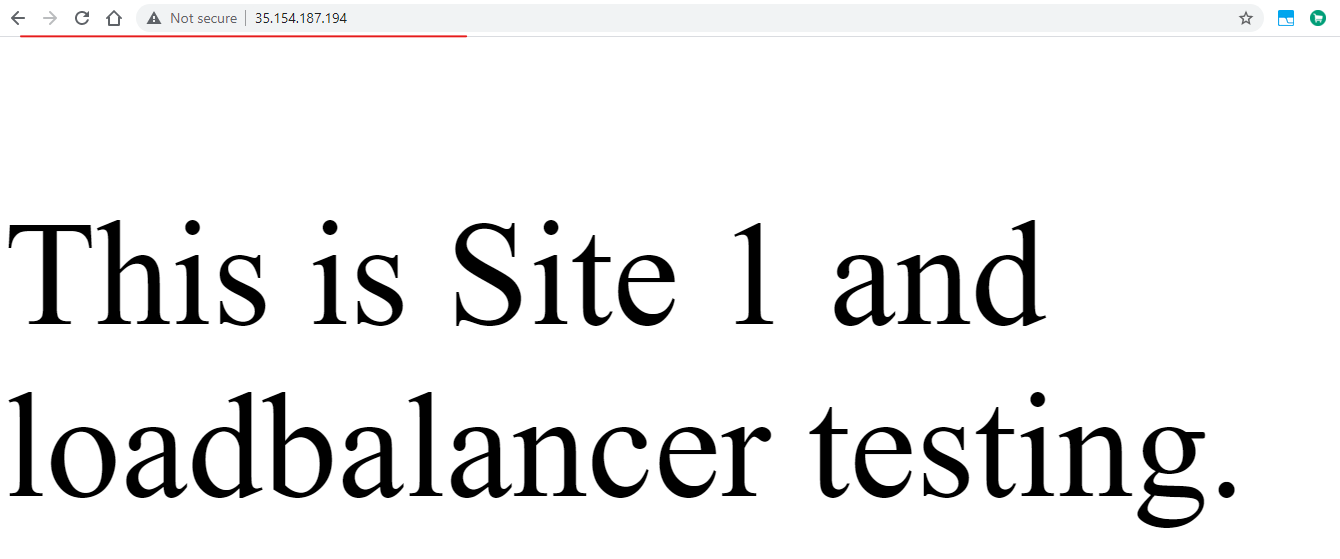
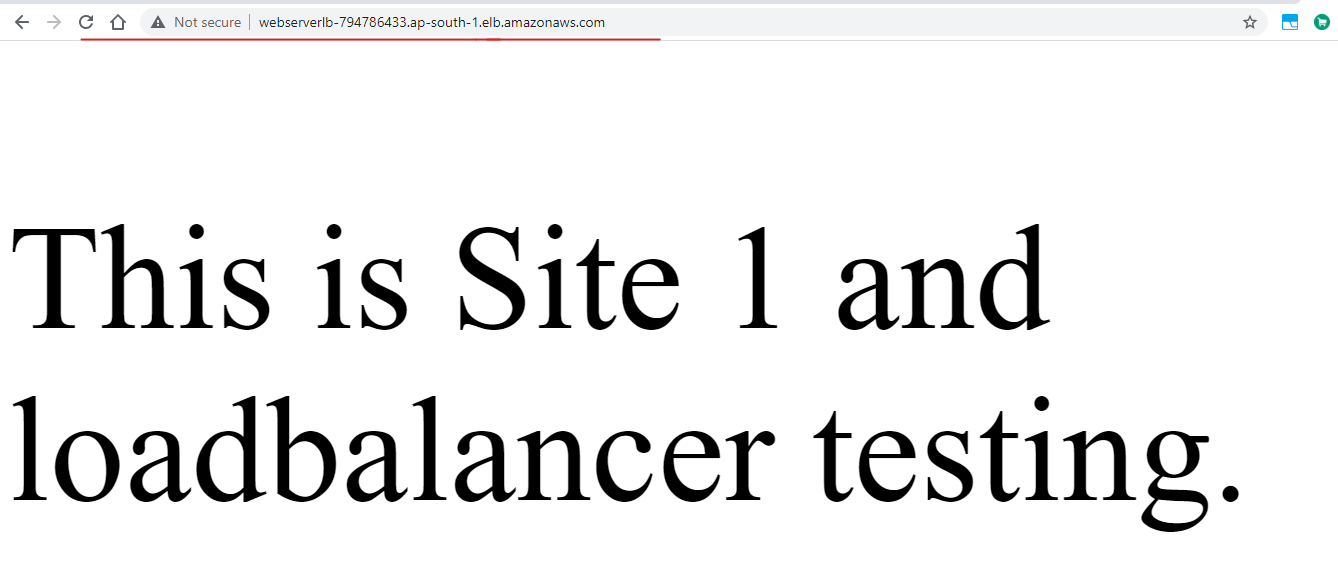
- Now we want to add index.html file in Webroot (/var/www/html/) and add the below content on it
sudo vi /var/www/html/index.html
<!DOCTYPE html>
<html>
<head>
<style>
p.ex2 {
  font-size: 150px;
}
</style>
</head>
<body>


<p class="ex2">This is Site 1  and loadbalancer testing.</p>

</body>
</html>
- Check this server public ip in browser.
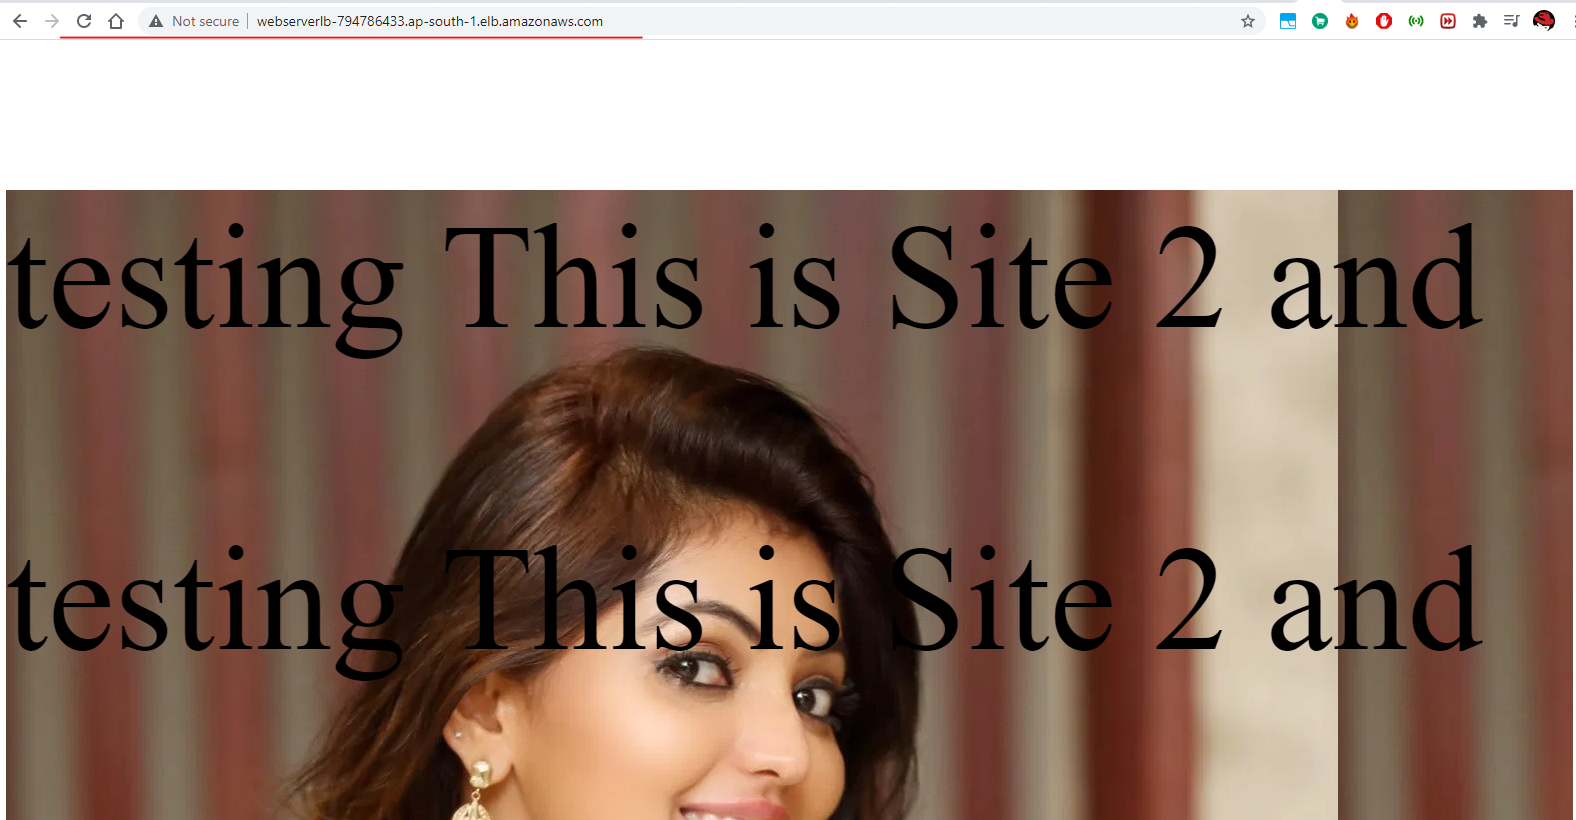
Do the same steps in server 2 and just change the index.html content given below.
<!DOCTYPE html>
<html>
<head>
<style>
p.ex2 {
  font-size: 150px;
}
</style>
</head>
<body>

<div style="background-image: url('https://i1.wp.com/www.socialnews.xyz/wp-content/uploads/2019/12/12/Actress-Athulya-Ravi-New-Cute-Stills-.jpg?quality=90&zoom=1&ssl=1');">

<p class="ex2"> testing This is Site 2  and </p>                                                                        <p class="ex2"> testing This is Site 2  and </p>                                                                        <p class="ex2"> testing This is Site 2  and </p>                                                                        <p class="ex2"> testing This is Site 2  and </p>                                                                        <p class="ex2"> testing This is Site 2  and </p>                                                                        <p class="ex2"> testing This is Site 2  and </p>                                                                        <p class="ex2"> testing This is Site 2  and </p>

</body>
</html>
- Then check server 2 public ip in browser.

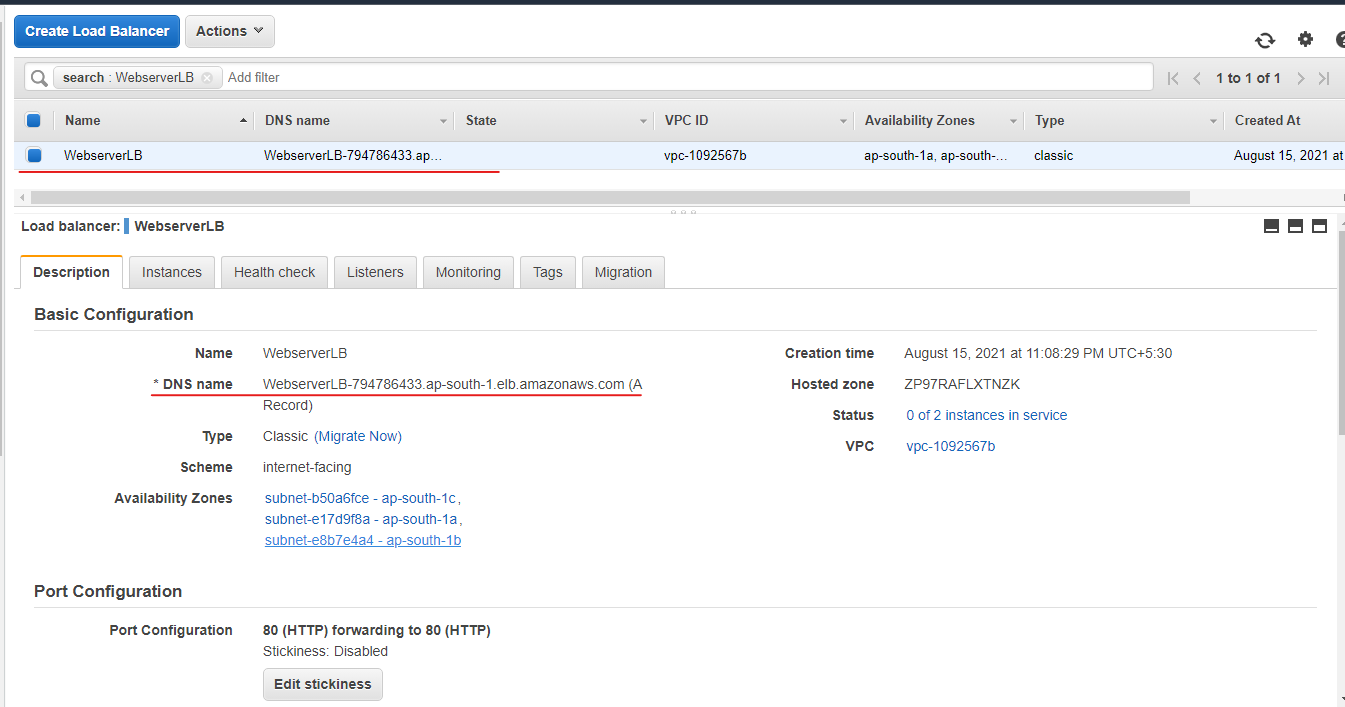
3. AWS Classic Load balancer configuration.
- You can open load balancer in Ec2 dash borad right side . open it
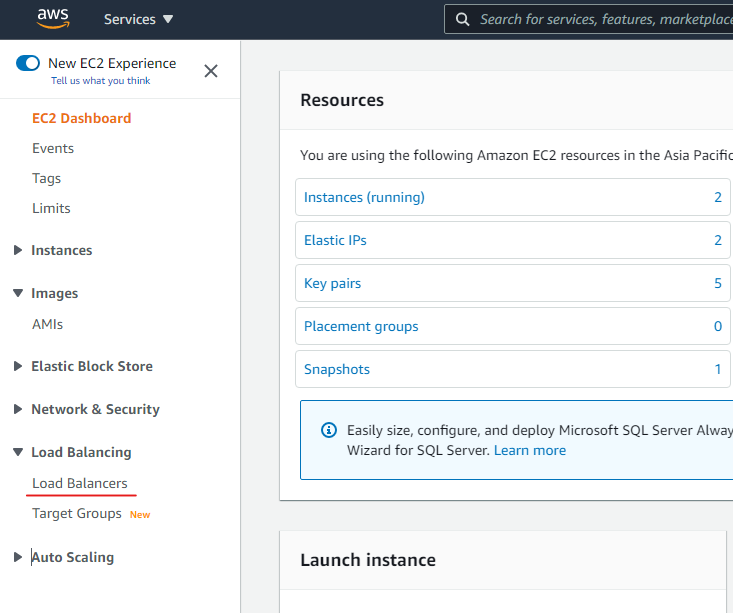

- Select classic loadbalncer
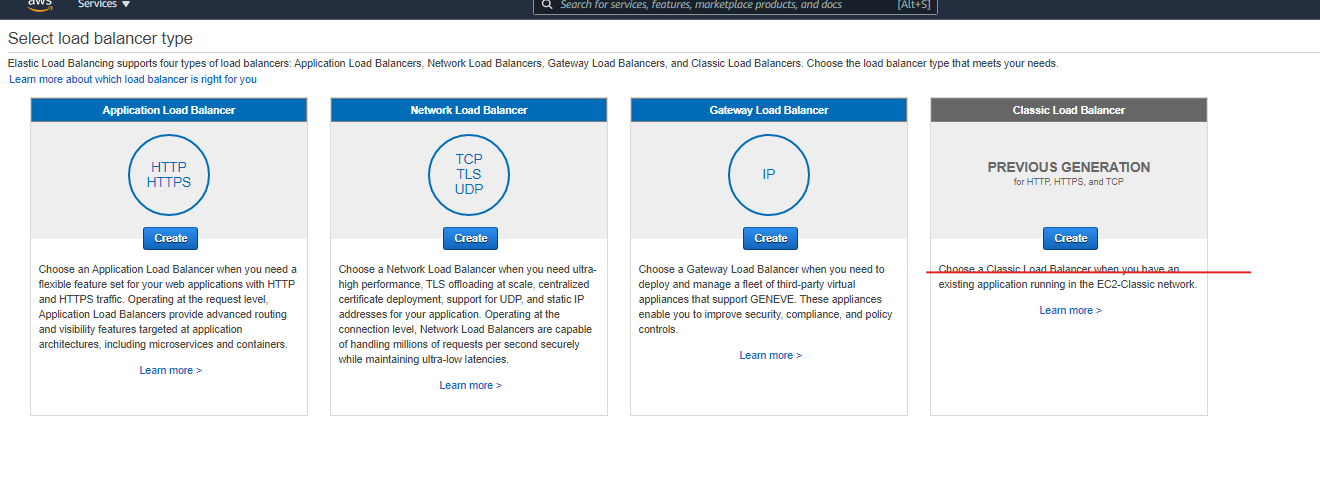
Now we are going to configure the Loadbalncer.
The configuration is 7 parts
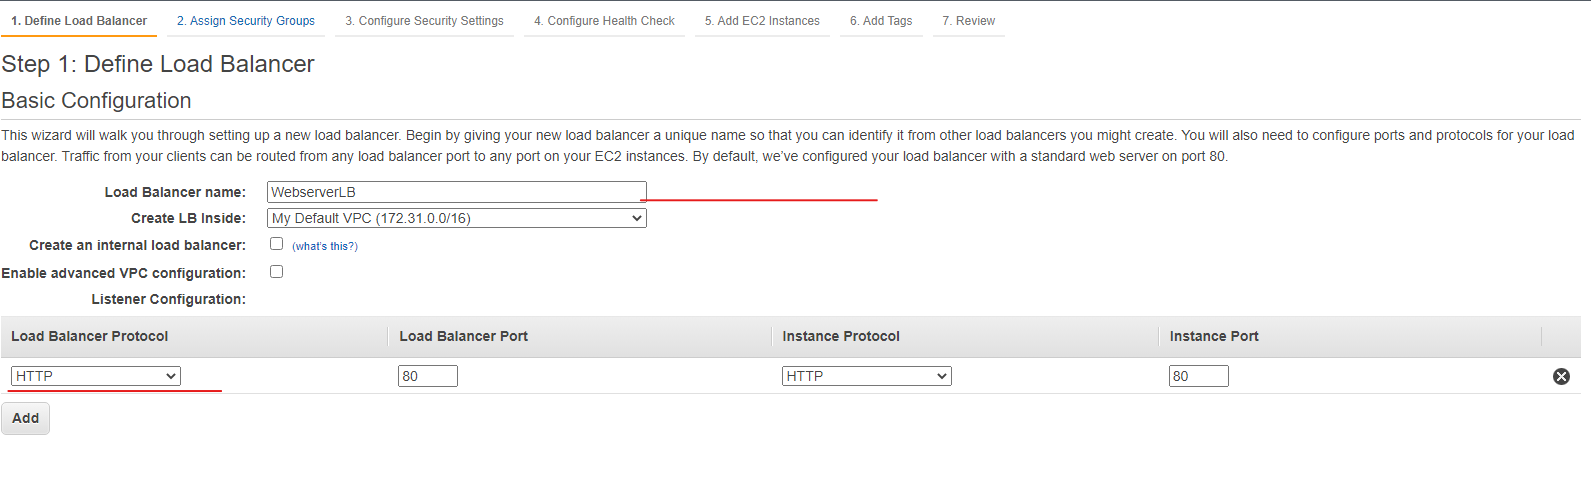
Step 1: Define Load Balancer
- Here you mention the Loadbalncer name and select the protocol http. because we load balance basic webservers.
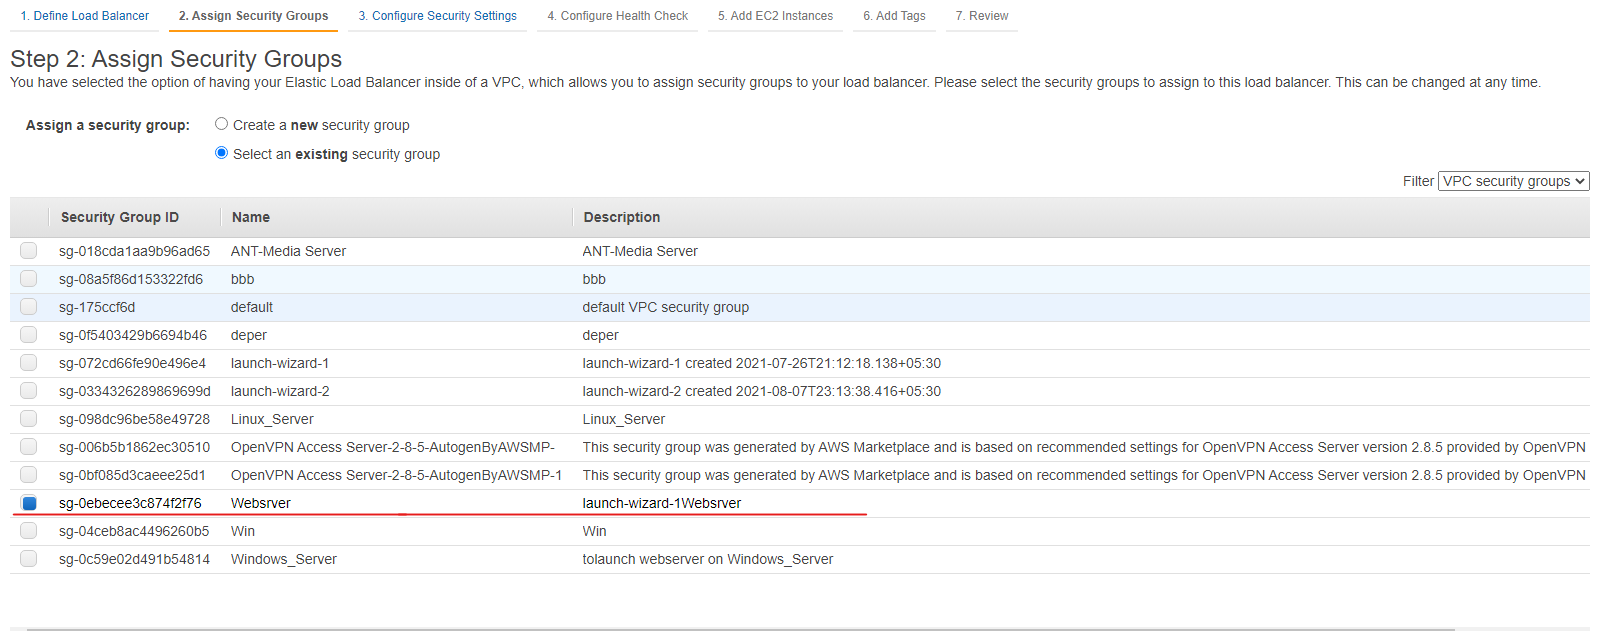
Step 2: Assign The Security Groups
- In this section you can assign your servers security group or create new that allows http protocl
Leave the section 3 configuration. because we configure basic http. not a https.
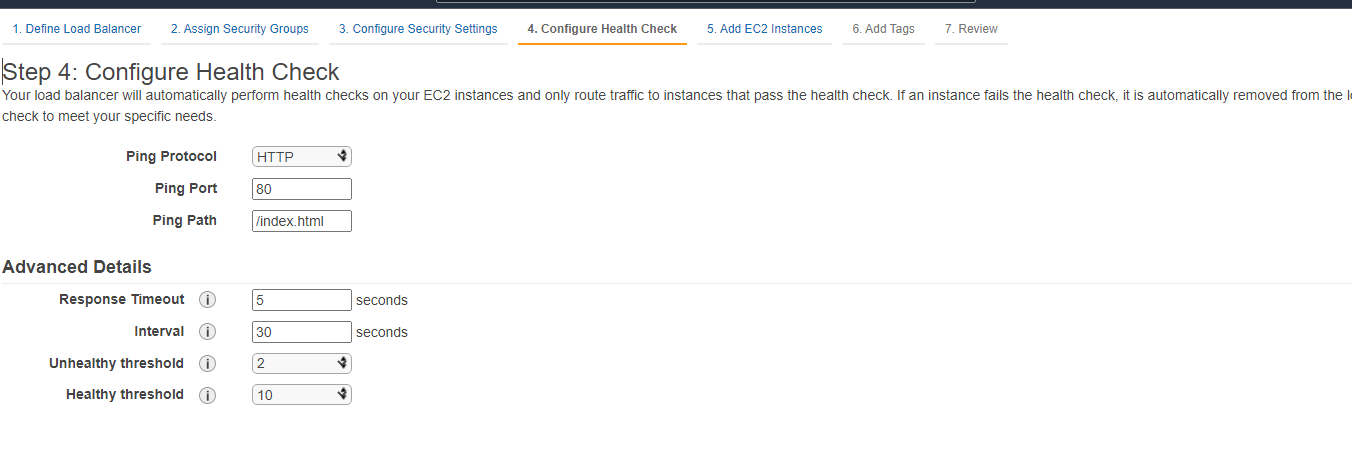
Step 4: Configure Health Check
- In this section you want mention which files is you going to moniter to know the server health check.
- Port number and protocol
- Leave other options default.
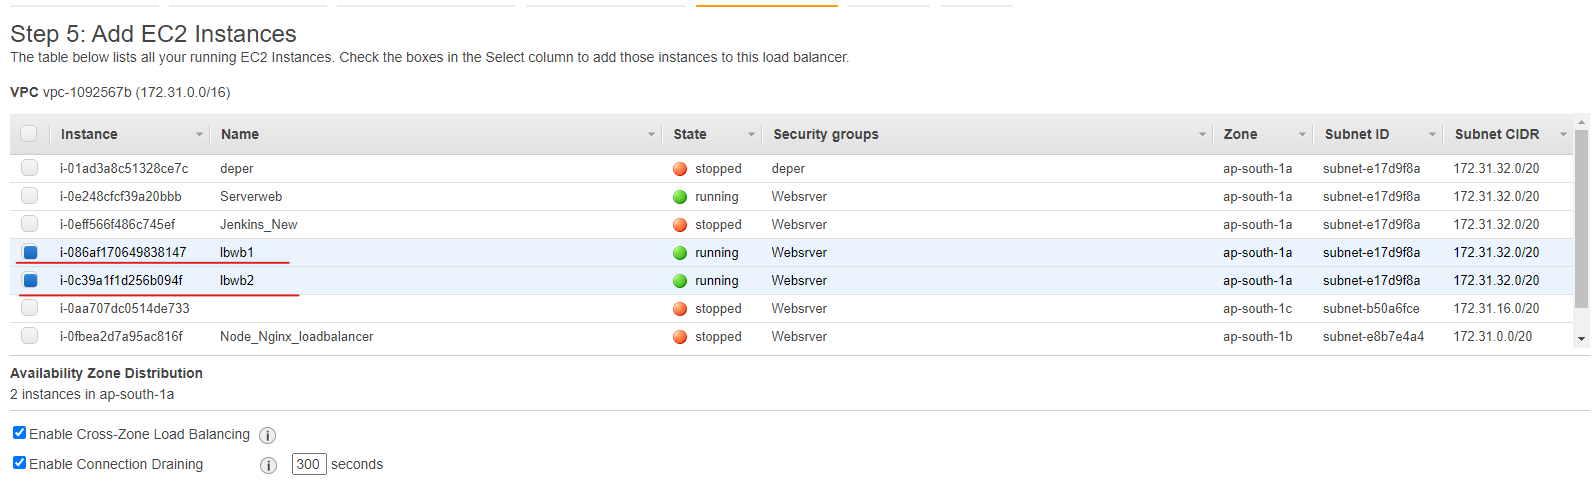
Step 5: Add EC2 Instances
- Here we are add the 2 webservers which are want to load balance.
Next add tags ignore that. finally review the settings and create.
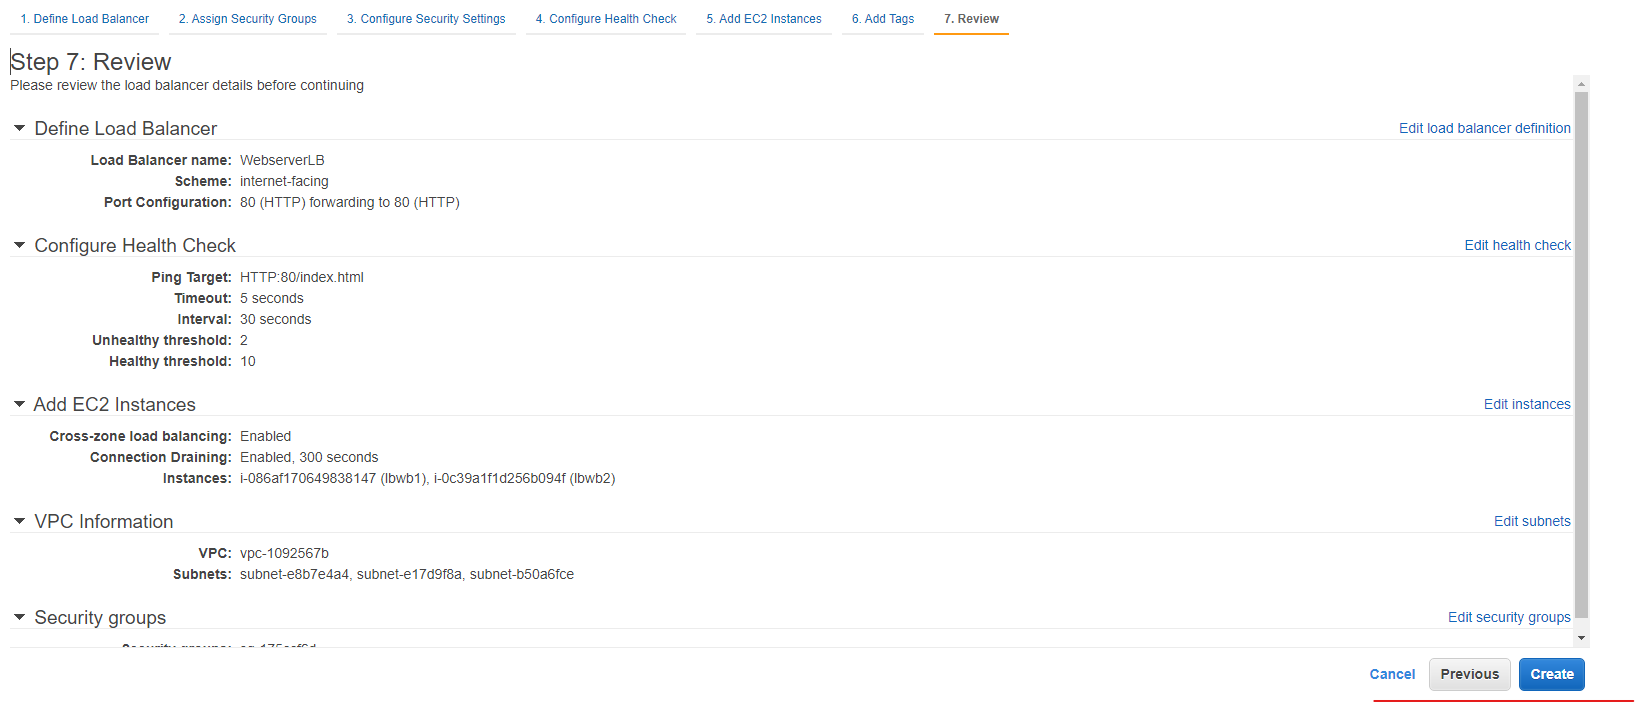
Yeah thats all. we have created the classic load balancer successfully.
Final -Testing section.
- Now we are going to check.
- Go to the Loadbalncer console.
- See her you can view your created Loadbalncer .just copy the load balancer dns and paste it in browser.
- In your first hit it shows webserver one content.
- On the refresh or second hit you can view your webserver 2 content.
That's all guys..... we are suucefully configured classic Loadbalncer and tested it.

